Elastic Resistance Tubing: The Core Tool in Every Arm-Care Framework
Executive Summary
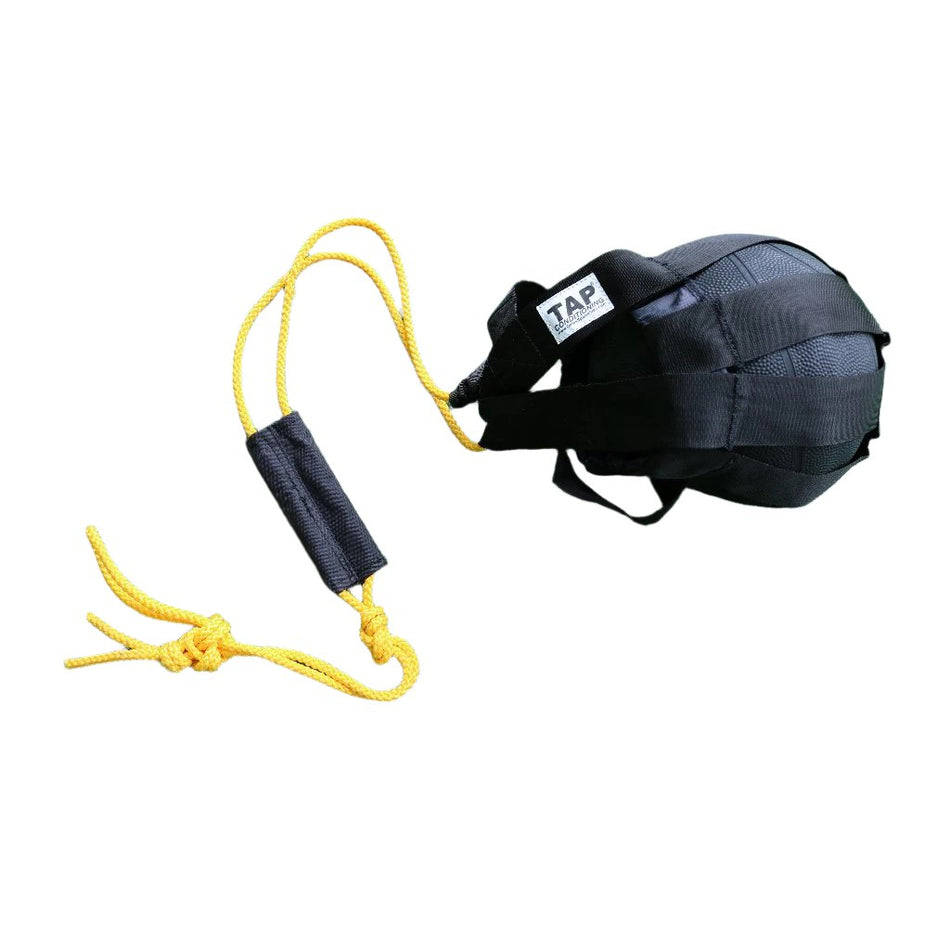
For Oates Specialties' arm‑care framework, elastic resistance tubing is the consistent tool that shows up in every phase: Prepare, Compete, and Restore. It's the piece of equipment that actually fits into a backpack, clips to a fence, and still moves the needle on the things coaches care about most—velocity, durability, and day‑to‑day readiness.
- A six‑week in‑season surgical‑tubing program in high school pitchers improved shoulder strength and pitching velocity without producing time‑loss shoulder or elbow injuries, showing that a small, consistent tubing routine can pay off on the mound.
- On‑field EMG work has confirmed that a handful of common band drills—external rotation in the "lay‑back" position, banded acceleration and deceleration moves, low rows, and scapular punches—hit the key shoulder muscles throwers rely on during real pitches.
- Youth Throwers Ten and hospital‑based overhead‑athlete programs use a single piece of elastic resistance to improve range of motion, scapular strength, posture, and even elbow injury rates in younger athletes, proving tubing isn't just a pro‑only tool.
- The way tubing is built and connected matters: clinic‑grade surgical tubing vs sheathed team tubing, handles vs cuffs vs ball‑in‑hand, and smart use of snap‑hook anchors all change how load is delivered and how easy it is for coaches to run clean, safe arm‑care sessions.
- When tubing is matched to the athlete, the exercise, and the phase of the week, it becomes a practical method to support a broader arm‑care framework: priming the arm before throwing, maintaining feel during competition, and helping restore comfortable motion after the fact.

1. Why tubing belongs in every arm‑care framework
Every serious methodology has its own language—at Oates, that's the Prepare / Compete / Restore arm‑care model. Elastic tubing fits all three phases in a way few other tools can.
- Prepare: After a general movement warm‑up, a short band circuit can wake up the rotator cuff and scapula, move the shoulder through familiar ranges, and give pitchers a sense that their arm is "online" before they ever touch a baseball.
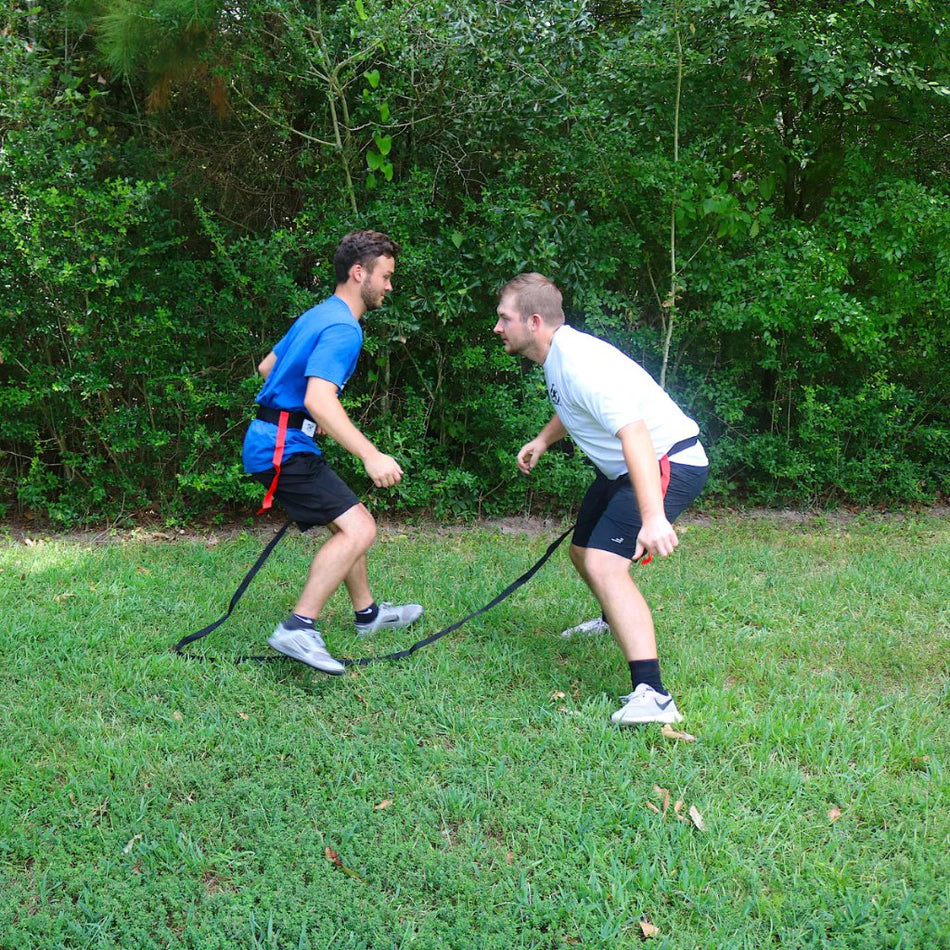
- Compete: Between innings or in the middle of a long travel day, tubing gives athletes a way to keep the arm feeling ready without adding heavy throws to their workload or dragging a full gym across state lines.
- Restore: The day of and the day after an outing, lighter tubing helps reclaim comfortable ranges and maintain the movement habits coaches have worked hard to build. It also allows the athlete a chance to increase blood flow which aids in the body's natural recovery process.
This isn't guesswork. In-season studies of high school pitchers have shown that layering a surgical-tubing routine onto standard baseball activities leads to measurable increases in both shoulder strength and mound velocity, all while maintaining a track record of zero time-loss injuries. This performance is backed by on-field EMG data, which confirms that standard band drills heavily recruit the same critical stabilizers utilized during the pitching motion. Ultimately, tubing is the rare tool that survives the rigors of a grueling baseball calendar while consistently delivering the data-backed results coaches demand.
2. What the research actually says
A six‑week bump in strength and velocity
The Oregon State work with high school pitchers is worth having in your back pocket. Twenty‑four pitchers were split into a tubing group and a control group; the tubing group added six surgical‑tubing shoulder exercises during the season.
By the end of six weeks:
- The tubing group had greater gains in internal and external rotation strength at the shoulder.
- They also saw a significant increase in pitching velocity, while the control group did not.
- No time‑loss shoulder or elbow injuries were recorded in the tubing group during the program.
For a coach, the takeaway is straightforward: a modest, well‑targeted tubing routine can quietly help pitchers hold or improve performance in‑season without beating them up.
On‑field band drills that actually matter
Another group of researchers took 12 rubber‑tubing exercises throwers were already using on the field and wired up the shoulder to see which ones did the real work. They played with anchor height—sometimes the tubing was fixed low, sometimes at elbow height, sometimes high—to match different phases of the throwing motion.
Seven exercises led the pack, including:
- External rotation in the arm‑cocking "lay‑back" position (external rotation at 90 degrees of shoulder abduction).
- A banded throwing acceleration move, with the arm moving across the body like it does off the mound.
- A deceleration pattern that mimicked the arm slowing down after release.
- Low scapular rows and scapular punches that lit up the shoulder‑blade muscles.
All seven can be done in under ten minutes if athletes hit about 30 smooth reps per drill at a steady tempo, making them realistic candidates for a pre‑throw circuit in the bullpen or down the line.
Youth‑specific arm‑care with one band
At the younger end, the Youth Throwers Ten program re‑worked the classic Thrower's Ten idea for kids using body weight and a single piece of elastic resistance. When youth throwers followed it at least once a week, researchers saw:
- Lower medial elbow injury rates.
- Better shoulder rotation and hip internal rotation.
- Improved lower trapezius strength and more favorable thoracic posture.
Dartmouth‑Hitchcock's overhead‑athlete packet tells the same story from a hospital perspective: bands anchored above, at, and below shoulder height, with rotation and diagonal patterns used to prepare and protect athletes whose sports live overhead. For coaches, that's a green light to treat tubing as a first‑line tool for kids and teens, not just a pro or rehab‑only resource.
3. Surgical vs sheathed tubing: choosing the right "engine"
Not all tubing is built the same, and that's a good thing.
Surgical tubing: precise and proven
Clinic‑grade surgical tubing—the kind associated with TheraBand—is what showed up in the high‑school pitcher study and what many therapists reach for in shoulder rehab. TheraBand's own instructions emphasize a few key points:
- Check the tubing before each use; if there are cracks, thinning, or nicks, it's done.
- Attach it to stable, smooth anchors or approved accessories, not sharp or abrasive surfaces.
- Don't stretch it more than about 300% of its resting length—roughly three times as long as it is at rest.
When you respect those boundaries, surgical tubing feels predictable and responsive. It's ideal when you're chasing specific arm‑care patterns, and it's a natural fit for more mature or higher‑level athletes who can handle load.
Sheathed tubing: built for teams and travel
Sheathed tubing takes that same basic elastic idea and wraps it in a protective sleeve. That sleeve:
- Shields the inner tube from fence posts, door frames, and the general abuse of team life.
- Helps contain the tubing if it fails, reducing the risk of a sudden snap‑back.
- Allows a more forgiving working distance in full‑body patterns without flirting with catastrophic overstretch.
In team environments, especially with mixed ages and varying attention to detail, sheathed tubing becomes the workhorse: durable, safer to share, and better suited to the realities of buses, backfields, and chain‑link fences.
4. Handles, cuffs, and balls in the hand: changing the feel on purpose
What the hand is doing:
Hand‑grip research has shown that gripping a ball and gripping a handle are not interchangeable.
- A spherical "ball" grip drives higher activation in the thumb pad and the small muscles inside the hand, and forces the fingers to spread and curve—very similar to how a pitcher actually holds a baseball.
- A cylindrical handle grip distributes force differently and tends to behave more like a classic power grip.
- Forearm muscle patterns change with grip type, not just with how hard an athlete pulls.
So:
- If the goal is to rehearse grip and hand feel, adding a ball in the hand while the band provides resistance makes the drill more "throw‑like" at the level of the fingers and thumb.
- If the goal is to de‑emphasize the hand and focus on what the shoulder blade and upper arm are doing, a handle or cuff that reduces or removes grip demands can be a better choice.
Why cuffs and forearm loops show up in scapular work
Look at scapular‑control drills from sports‑physio sources and you'll often see bands looped around the wrists or forearms instead of being held in the hands. The logic:
- Take finger tension out of the equation.
- Force the athlete to organize at the shoulder and scapula instead of squeezing harder.
A wrist cuff attached to tubing is simply a baseball‑specific version of that idea. It secures the load to the forearm so the athlete can let the fingers relax, feel the scapula glide on the rib cage, and move through throw‑relevant arm slots without fighting a handle.
An additional advantage of wrist cuffs: Because the hand is free, athletes can hold a ball during tubing exercises. This allows them to rehearse throwing grip and the spherical hand position while the tubing loads the shoulder and scapula.
Handles, cuffs, and ball‑in‑hand setups aren't competing; they're different ways of turning the same tubing into different drills.
5. Anchors, snap hooks, and staying inside the safe zone
No tubing program is better than its anchors and safety habits.
Manufacturer instructions and clinic safety sheets all say roughly the same things:
- Attach bands and tubing to stable, non‑moving structures.
- Keep the attachment point smooth to avoid cutting into the material.
- Inspect both the elastic and the connection point regularly.
- Avoid stretching bands past about three times their resting length.
Dedicated clips like carabiners and snap hooks line up with that advice:
- They create a consistent, secure connection to the anchor.
- They make it easy to move the anchor point up or down a fence, net pole, or rack without having to re‑tie knots.
- They give coaches one obvious piece of hardware to check for wear each week.
The other part of safety is knowing when to change bands. Guidance from TheraBand and clinic sheets is clear: if you have to stretch a light band nearly to its limit to get the load you want, it's time to move up a resistance level. Overstretching lighter tubing doesn't just raise the odds of a snap; it also accelerates wear and shortens the band's useful life.
6. Youth guidelines: what changes when your pitchers are 12, not 20
The research on youth throwers points toward a simple idea: give them enough load and complexity to build good habits, but not so much volume or resistance that they're surviving the program instead of owning it.
Youth Throwers Ten is a good model:
- It uses body weight and a single band.
- It calls for 2 sets of 10 reps per exercise, with minimal rest, at least once per week.
- It cues posture and scapular position constantly, with an eye toward movement quality instead of chasing fatigue.
For coaches of 9–14‑year‑olds, that translates to:
- Lighter bands across the board, especially for rotation and diagonal patterns.
- Fewer total drills per session—often 4–6 good movements are enough.
- More emphasis on rhythm, breathing, and positions, less on "burn" or "pump."
- A clear lane for tubing as part of arm‑care and movement education, not a substitute for age‑appropriate throwing limits and rest.
With older high‑school and college arms, you can expand the menu and the intensity. With kids, the tubing's job is to build a base and teach them what "clean" movement feels like.
7. How tubing actually looks inside the week (example circuits)
There's no single perfect tubing program, but the research gives you enough to sketch out patterns that fit the arm‑care framework.
Example: Prepare circuit (pre‑throw, 5–8 minutes)
After your general warm‑up:
- External rotation at the side with towel roll: Light band, 1–2 sets of 10–15 each arm.
- External rotation in the lay‑back position (90 degrees of shoulder abduction and elbow flexion): Light band, 1–2 sets of 10–15 smooth reps.
- Low scapular row: Band anchored at or just above elbow height, 1–2 sets of 10–15, focusing on pulling the shoulder blade back and down.
- Scapular punch: Band behind the athlete at roughly elbow height, 1–2 sets of 10–15, finishing with a long reach and controlled return.
- Simple diagonal (across‑body pull that echoes acceleration): Moderate band, 1 set of 10–12 each arm, not to fatigue.
Everything should feel rhythmic and under control. The goal is to step onto the mound feeling that the shoulder and scapula know where they're supposed to go.
Example: Restore circuit (post‑throw or next‑day, 5–10 minutes)
On the day of or the day after an outing:
- Very light external and internal rotation at the side: 1–2 sets of 10–15, just to keep rotation comfortable.
- Short‑range rows: High‑quality squeezes, 1–2 sets of 10–15.
- Gentle diagonals: Lower resistance, slow tempo, 1 set of 10 each way.
- Band‑around‑wrists scapular control (Y or W pattern): Light loop around wrists, small range, 1–2 sets of 8–10 focusing on shoulder‑blade motion.
Here the coaching cue is "easy and smooth." If the athletes chase fatigue, they've missed the point.
These are examples, not prescriptions. They show how a coach can use the same tubing differently in Prepare and Restore phases while still staying inside the boundaries the research and safety standards describe.

Safety & Brand Disclaimer
Reference Standards: References to TheraBand® serve as a benchmark for elastic-resistance best practices, as its safety and resistance protocols are widely documented in professional literature. This content is not authored, reviewed, or endorsed by TheraBand®; these principles apply to any high-quality tubing used within an arm-care framework.
Educational Disclosure: This information is for educational purposes and is not a substitute for professional medical advice. Oates Specialties does not claim these tools "fix" mechanics or "prevent" injury. Performance and health depend on a holistic approach to workload, recovery, and preparation.
The "Odd Sensation" Rule
- Smooth Motion: If a drill requires "muscling" or straining, reduce the resistance.
- Stop on Discomfort: If an athlete feels sharp pain, pinching, or anything "odd," stop immediately and consult a professional.
- Supervision: Athletes 14 and under should use these tools under direct coach supervision, focusing on movement quality over intensity.
Annotated Bibliography
1. Walker, S. M. (2000). "The Effectiveness of a Surgical Tubing Strengthening Program in the Maintenance of Pitching Velocity and Shoulder Strength in High School Baseball Pitchers."
Six‑week in‑season study showing that a surgical‑tubing shoulder program improved pitching velocity and shoulder internal/external rotation strength in high‑school pitchers, with no time‑loss shoulder or elbow injuries reported in the tubing group.
2. Myers, J. B., et al. "On‑the‑Field Resistance‑Tubing Exercises for Throwers." Journal of Athletic Training.
EMG and load‑cell analysis of 12 rubber‑tubing exercises commonly used by throwers. Identified seven exercises that most effectively activated key shoulder muscles and described how anchor height (high, middle, low) affects loading.
URL (PubMed Central): https://pmc.ncbi.nlm.nih.gov/articles/PMC1088340/
3. Wilk, K. E., et al. (2021). "The Youth Throwers Ten Exercise Program: A Variation of an Exercise Series for Enhanced Dynamic Shoulder Control in the Youth Overhead Throwing Athlete." International Journal of Sports Physical Therapy.
Youth‑focused adaptation of the Thrower's Ten using body weight and a single band. Reported lower medial elbow injury incidence and improvements in shoulder rotation, hip internal rotation, lower trapezius strength, and thoracic posture when performed at least once per week.
4. Dartmouth‑Hitchcock Medical Center. "Fundamental Exercises for the Overhead Athlete."
Hospital‑authored PDF detailing warm‑up, mobility, and strengthening drills—including band‑based rotation and diagonal patterns—for overhead athletes. Reinforces the use of bands anchored at multiple heights and planes.
URL (overview page): https://www.dartmouth-hitchcock.org/orthopaedics/patient-support-education
5. Hughes, C. J., et al. (1999). "Resistance Properties of Thera‑Band® Tubing During Shoulder Abduction Exercise." Journal of Orthopaedic & Sports Physical Therapy.
Explores the force‑elongation characteristics of different colors of TheraBand tubing during a shoulder‑abduction task, showing distinct resistance curves by color and quantifying tension at various elongations.
PubMed abstract: https://pubmed.ncbi.nlm.nih.gov/10416181/
6. TheraBand. "Resistance Band & Tubing Instructions" and "Care & Safety."
Official manufacturer instructions covering inspection, anchoring, and safe elongation (typically up to 300% of resting length), along with general usage tips and example exercises.
Instruction manual (example host): https://manuals.plus/m/0d357b7ec50bb3d170409303d7d002d748a9c2d51073f37857c20063352ad966
Care & safety page: https://www.theraband.com/care-and-safety
7. De la Barrera, E. J., et al. (2014). "Quantification of Functional Hand Grip Using Electromyography and Kinematics."
EMG and kinematic study comparing different functional hand grips. Demonstrated that spherical and cylindrical grips produce different activation patterns in intrinsic hand and forearm muscles, supporting coaching distinctions between ball‑in‑hand and handle grips.
URL (PMC): https://pmc.ncbi.nlm.nih.gov/articles/PMC4273320/
8. Scapular‑control resources using bands around wrists/forearms (e.g., Body Works Sports Physiotherapy, Rejuv Exercise Library).
Clinical and medical‑fitness examples of resistance bands looped around wrists or forearms to emphasize scapular control and shoulder‑blade stabilization rather than grip strength.
Example URLs:
- Body Works: https://body-works.ca/physio-video/scapula-control-and-stabilization/
- Rejuv example video: https://www.youtube.com/watch?v=Qksy-ShxHB4
9. Patient safety sheets for resistance bands and tubing (e.g., OrthoBethesda, Aneurin Bevan University Health Board NHS).
Provide patient‑facing advice on safe band use, highlighting the need to avoid overstretching (commonly beyond 3× resting length), inspect for damage, and prevent bands from snapping toward the face or head.
URLs:
10. de Araujo et al., (2019). "Loading Patterns of Rubber‑Based Resistance Bands Across a Range of Elongations." Sports.
Discusses how elongation affects load and how repeated use and stretch can change band behavior over time, reinforcing the importance of appropriate band selection and avoiding chronic overstretch of light bands.
URL (PMC): https://pmc.ncbi.nlm.nih.gov/articles/PMC6358948/
About This Analysis
Created by the Oates Specialties team led by Robert Oates, M.Ed., Founder
Editorial oversight by Gunnar Thompson, BS, CSCS, General Manager
Certified Strength & Conditioning Specialist | Biomechanics Specialist
February 2026
Complete Credentials
ROBERT OATES, M.Ed., Founder: Founded Oates Specialties in 2003. Master of Education degree. Provides strategic direction for educational content and athlete development philosophy.
GUNNAR THOMPSON, General Manager: BS Kinesiology (Clinical Exercise Science). CSCS (NSCA), PES (NASM), CPPS certifications. Technical authority on biomechanics and performance science. Conducts review of all educational content for scientific accuracy.
Questions or corrections: gunnar@oatesspecialties.com